DIY or Buy Your S0tool
Choose the approach that fits you best: build your own S0tool from affordable, off-the-shelf components, or order a fully assembled PCB from the Huizebruin shop. Both options give you a local, ESPHome-compatible water and energy meter for Home Assistant.
Build It Yourself
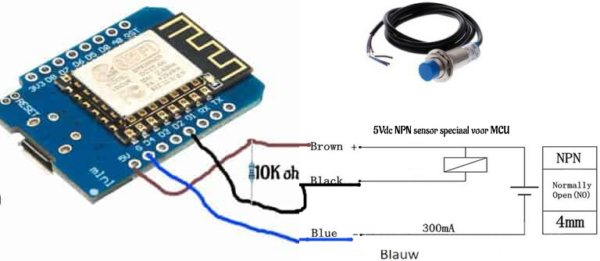
Use a Wemos D1 Mini (ESP8266) with a 5V NPN proximity sensor and a 10KΩ resistor — total cost under €10. Perfect for DIY enthusiasts and hobbyists.
- Connect one end of the 10KΩ resistor to
5V. - Connect the other end to
D2. - Attach
D2to the signal wire of the NPN sensor. - Connect the sensor's GND wire to
GND.
Minimum ESPHome: 2026.1.x — Minimum Home Assistant: 2026.1.x
Shopping List
| Part | Where to Buy |
|---|---|
| Wemos D1 Mini (ESP8266) | AliExpress · Amazon |
| NPN Proximity Sensor (5V) | AliExpress · Amazon · Opencircuit (NL) |
| 10KΩ Resistor | AliExpress · Amazon · Opencircuit (NL) |
| USB Cable + 5V Adapter | Any Micro-B phone charger |
Wiring Schematics
Water Meter (NPN)
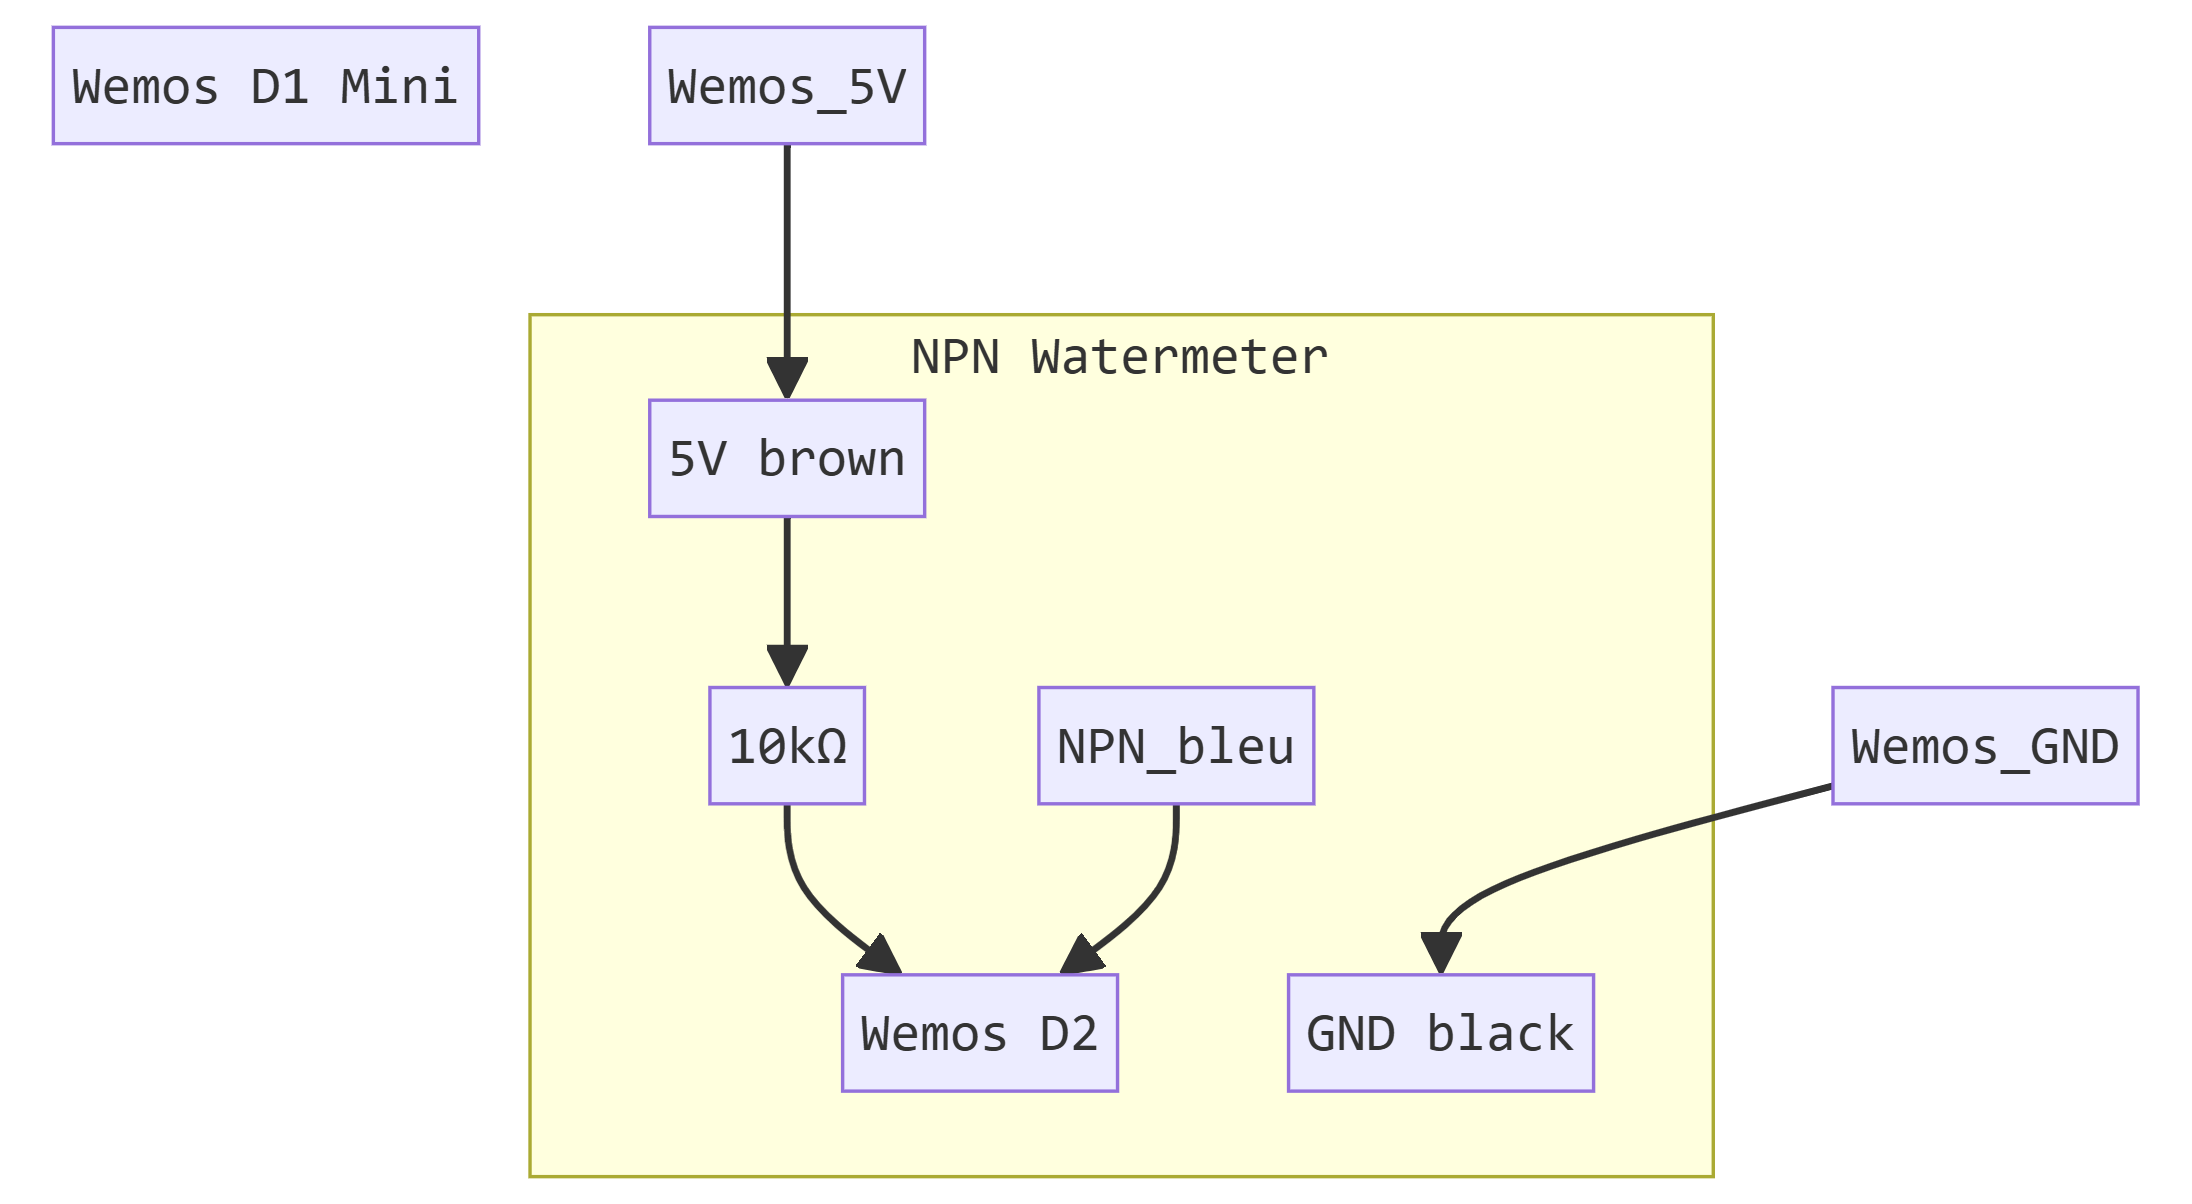
Connection to D2 with a 10K resistor.
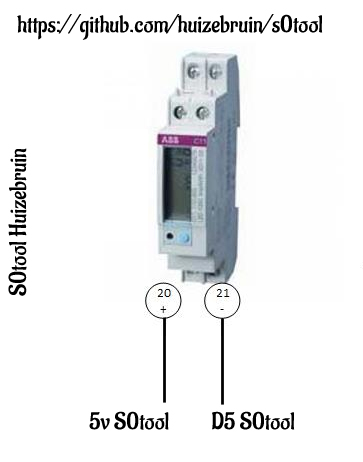
kWh Meter (S0)
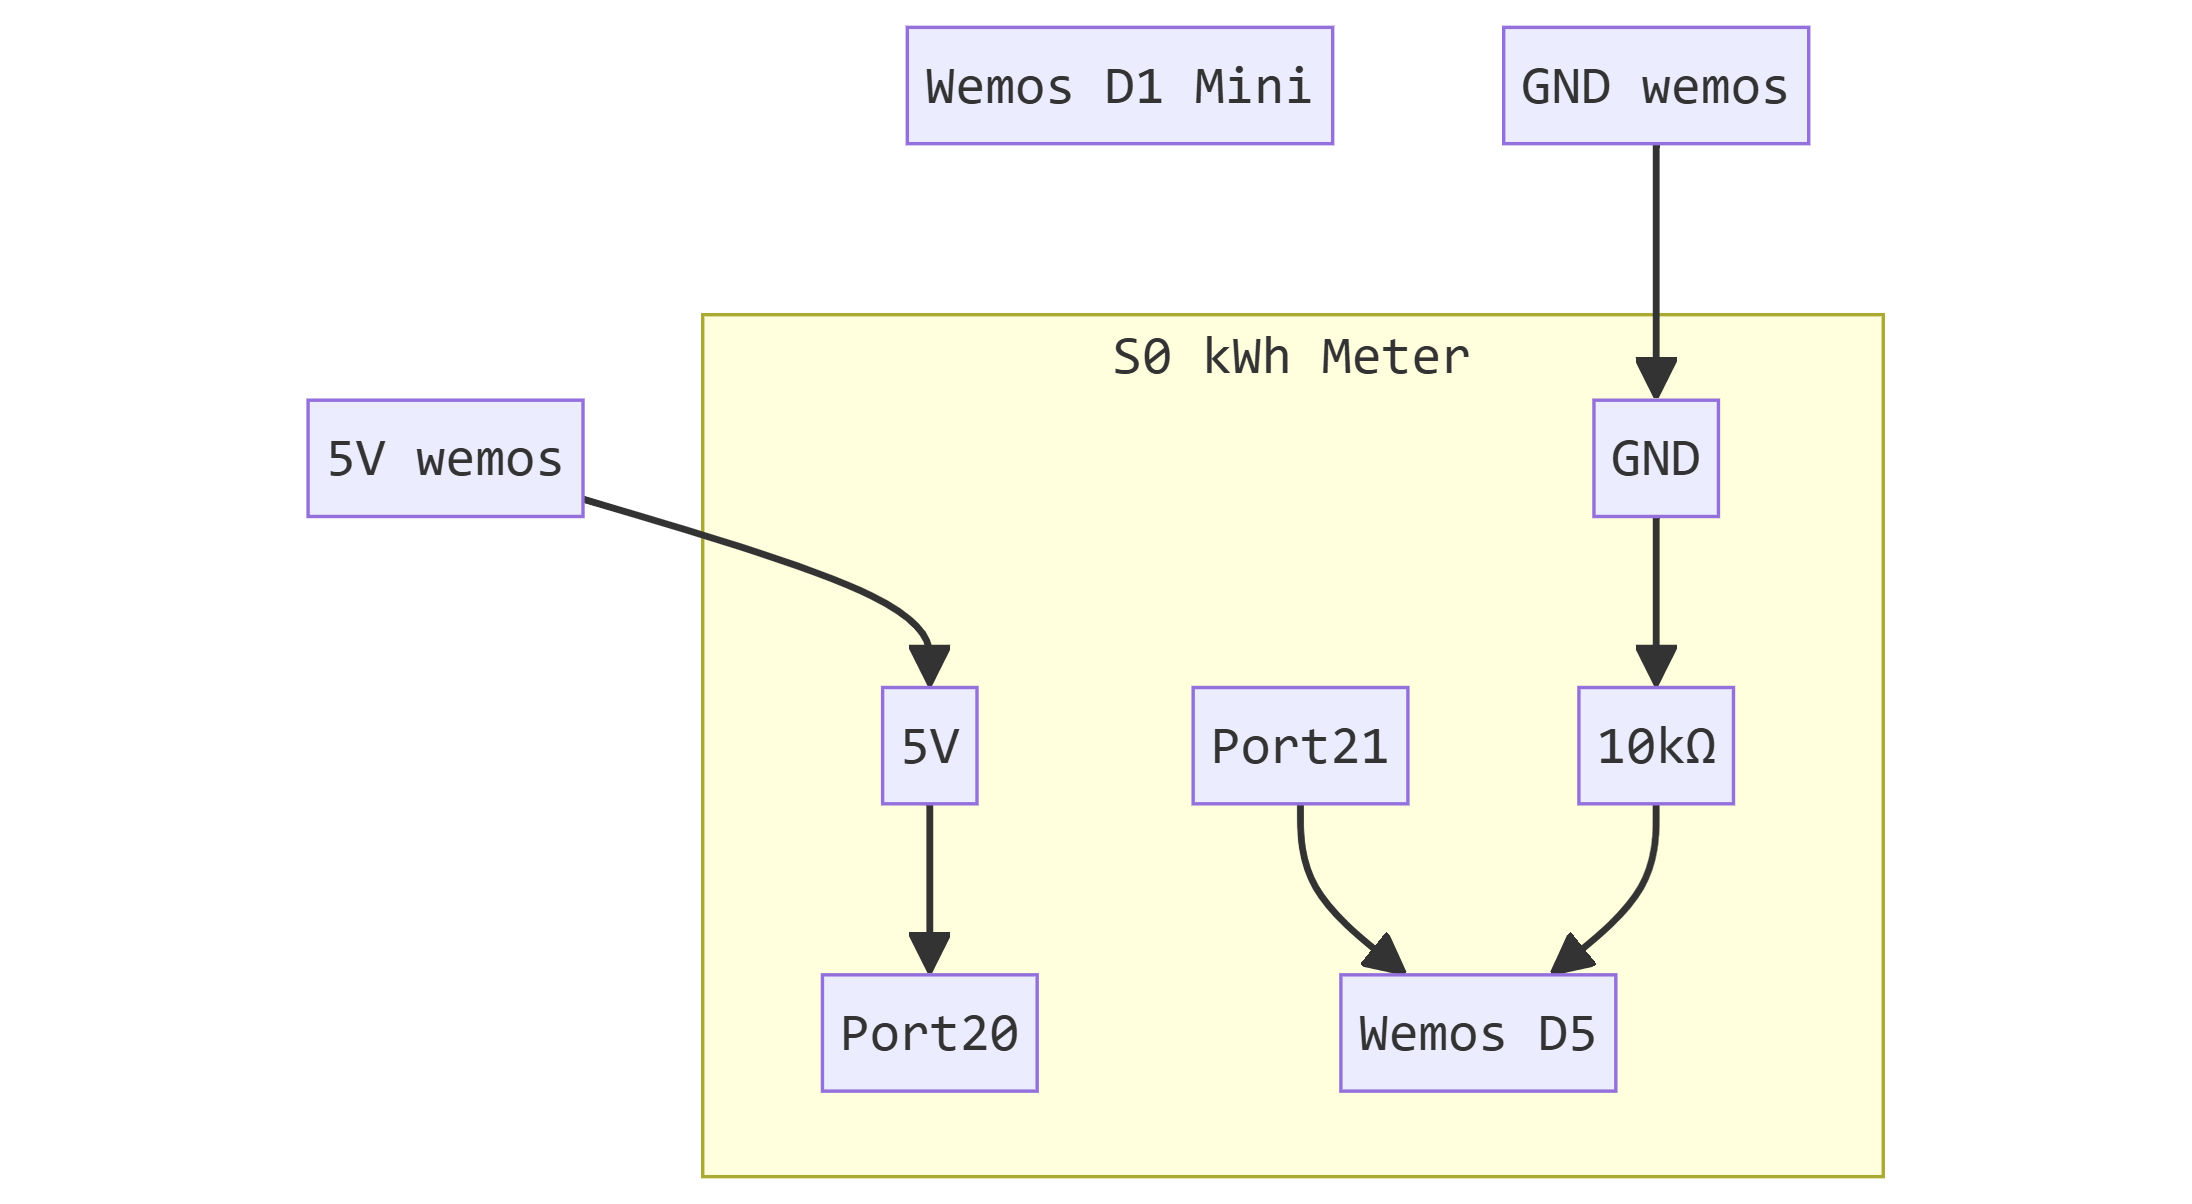
Connection to D5 (Ports 20/21).
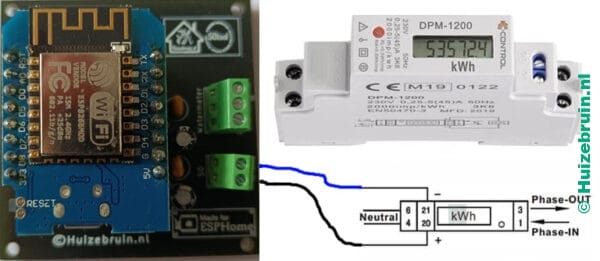
Complete S0tool PCB
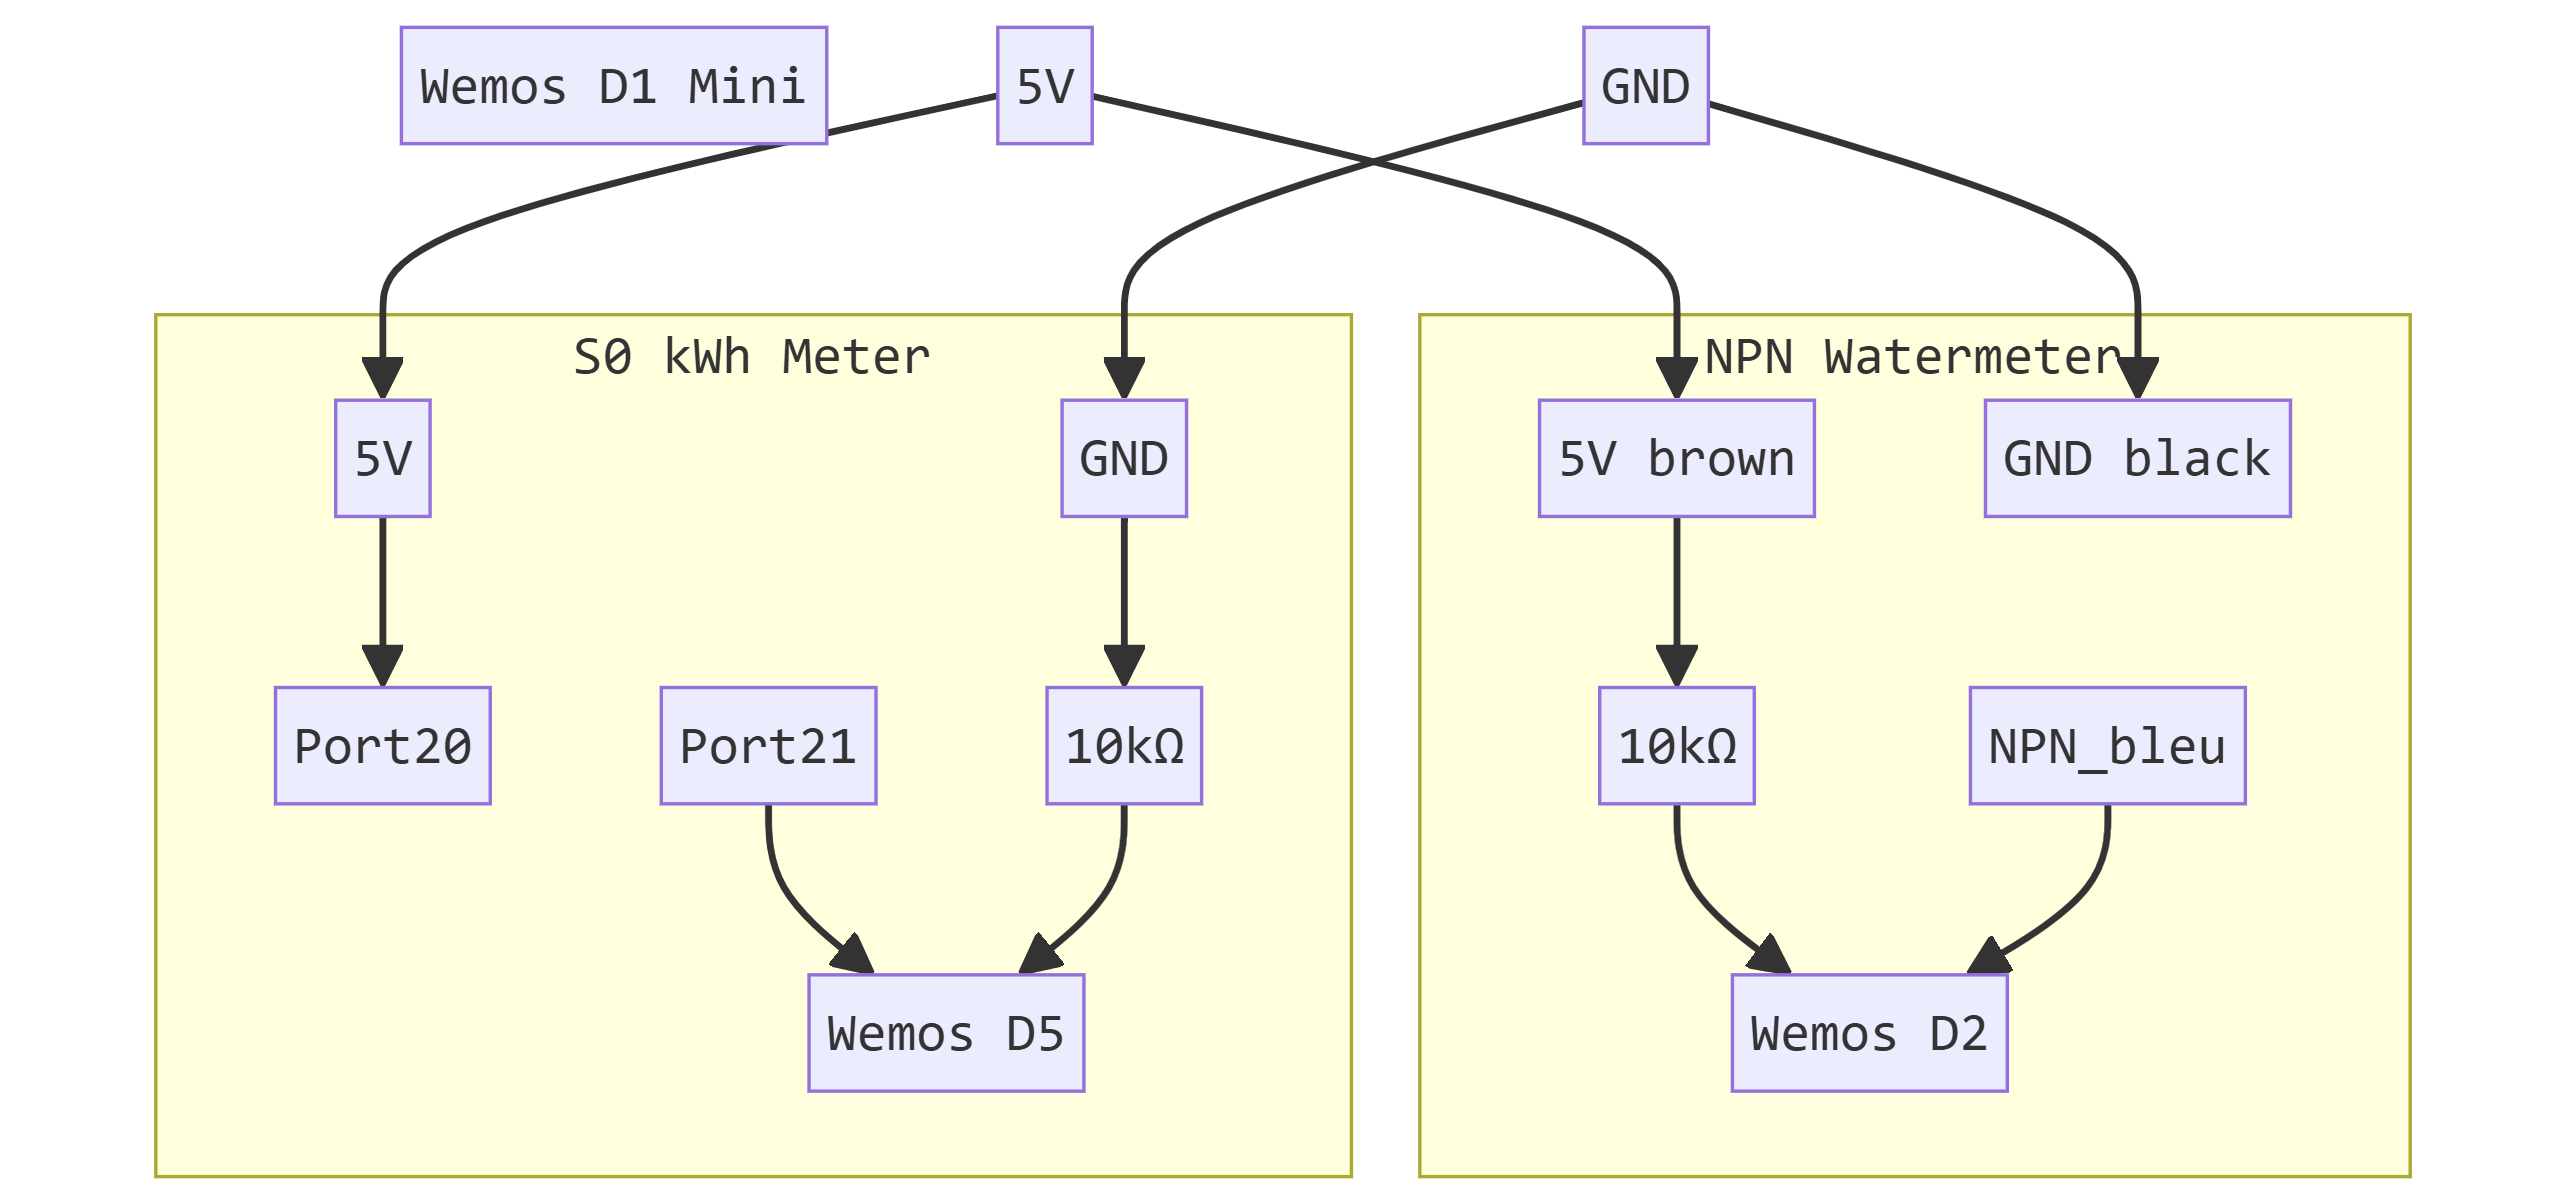
Detailed overview of s0 port and npn connections.
Click image to enlarge
Wiring Schematic wemos d1 and npn sensor
Click image to enlarge
Buy a Ready-Made S0tool
Skip soldering and order a fully assembled S0tool PCB. Comes with the 10KΩ resistor pre-installed. Shipping currently available to Netherlands, Belgium, Germany, and Estonia. For other countries, contact us by email.
Order from Huizebruin ShopkWh Meter Integration
- Ensure your kWh meter has an S0 output port.
- Connect a 10KΩ resistor between
GNDandD5. - Connect
5Vto port 20 of the S0 terminal. - Connect
D5to port 21 of the S0 terminal.